Translator’s note: This is the 17th article of the series “Cloud Foundry 100-day Challenge selection”. “#080” in the title means that it is 80th (published on October 16, 2015) in the original Japanese series.
Original Author: Noburou TANIGUCHI (GitHub) (BitBucket)
The 80th topic of “Cloud Foundry 100-Day Challenge” is the third (and most likely last) of the “Feed Readers that I am Personally Looking For” series, CommaFeed (1: Feedbin and 2: Tiny Tiny RSS (Translator’s note: Both are in Japanese)) . It is implemented with Java’s Dropwizard framework.
Basic Information
- Official site
https://www.commafeed.com/
Trial use is available (as a demo user, with certain restrictions). - Source code
https://github.com/Athou/commafeed - Other reference
- Dropwizard-related:
It was my first experience using a Dropwizard application, so we referenced some websites:- Getting Started – Dropwizard
(Translator’s note: The URL referred in the original Japanese post is dead. So we provide the URL for the nearest version used in the application of this post) - DropWizard: a Java framework that should be implemented immediately (Part 1) – Qiita
(Translator’s note: In Japanese)
- Getting Started – Dropwizard
- java-buildpack-related:
We utilized the following functions that are supported by java-buildpack:
- Dropwizard-related:
The summary of procedures is as follows:
- 1) Retrieving Source Code
- 2) Building Application
- 3) Creating and Binding Service
- 4) Creating Configuration File and Updating JAR File
- 5) Setting Environment Variables (Creating manifest.yml)
- 6) Deploying Application
- 7) Checking Application Behavior
1. Retrieving Source Code
We clone the source code from GitHub, and move to its directory.
$ git clone https://github.com/Athou/commafeed.git
..
$ cd commafeed/
2. Building Application
With Cloud Foundry’s java-buildpack, we need to build the application prior to deploying.
Let’s build the application based on its README.
$ ./mvnw clean package
[INFO] Scanning for projects...
[INFO]
[INFO] ------------------------------------------------------------------------
[INFO] Building CommaFeed 2.3.0-SNAPSHOT
[INFO] ------------------------------------------------------------------------
..
[INFO] ------------------------------------------------------------------------
[INFO] BUILD SUCCESS
[INFO] ------------------------------------------------------------------------
[INFO] Total time: 01:52 min
[INFO] Finished at: 2015-10-12T04:57:03+09:00
[INFO] Final Memory: 60M/569M
[INFO] ------------------------------------------------------------------------
target/commafeed.jar should have been generated.
$ ls target/commafeed.jar
target/commafeed.jar
3. Creating and Binding Service
CommaFeed uses DBMS for persistent data. It is configured to use H2 by default, but H2 will store data into local files, resulting in data loss upon restart on Cloud Foundry. Hence, we will use a PostgreSQL service in this post.
Uploading Application
Let’s push the application to Cloud Foundry without starting.
$ cf push commafeed -p target/commafeed.jar --no-start
Creating app commafeed in org nota-ja / space 100 as nota-ja...
OK
..
Creating Service
Next we create a PostgreSQL service.
$ cf create-service PostgreSQL "Basic PostgreSQL Plan" pg-commafeed
Creating service instance pg-commafeed in org nota-ja / space 100 as nota-ja...
OK
..
Binding Service
We then bind the application with the service.
$ cf bind-service commafeed pg-commafeed
Binding service pg-commafeed to app commafeed in org nota-ja / space 100 as nota-ja...
OK
..
4. Creating Configuration File and Updating JAR File
CommaFeed requires a configuration file to start, so we need to create one. Additionally, we store it in the JAR file so that this settings file can be uploaded.
Creating Configuration File
We copy config.yml.example, and make necessary modifications.
$ cp config.yml.example config.yml
$ emacs config.yml
The following are the three main modifications:
pulicUrl
We need to set this to match the application URL.allowRegistrations
We need to enable user registrations from the application screen.
This application has an administrator screen where users can be registered, but since Cloud Foundry does not currently allow assigning multiple ports to one application (development is under way), today we chose to enable registrations from the application screen.database
Lastly, we need to runcf envand set appropriate values in accordance with database connection information fromVCAP_SERVICES.
$ cf env commafeed
Getting env variables for app commafeed in org nota-ja / space 100 as nota-ja...
OK

System-Provided:
{
 "VCAP_SERVICES": {
  "PostgreSQL": [
   {
    "credentials": {
     "uri": "postgres://ea4badfa-a871-4237-a534-9d69fb464200:[email protected]:5432/ea4badfa-a871-4237-a534-9d69fb464200"
    },
    "label": "PostgreSQL",
    "name": "pg-commafeed",
    "plan": "Basic PostgreSQL Plan",
    "tags": [
     "PostgreSQL",
     "Database storage"
    ]
   }
  ]
 }
}
..
This is what it looked like after all modifications:
$ git diff --no-index -- config.yml.example config.ymldiff --git a/config.yml.example b/config.yml
index 5f6d167..2f7e219 100644
--- a/config.yml.example
+++ b/config.yml
@@ -2,13 +2,13 @@
 # ------------------
 app:
   # url used to access commafeed
-  publicUrl: http://localhost:8082/
+  publicUrl: http://commafeed.10.244.0.34.xip.io/^M

   # wether to allow user registrations
-  allowRegistrations: false
+  allowRegistrations: true^M

   # create a demo account the first time the app starts
-  createDemoAccount: false
+  createDemoAccount: true^M

   # put your google analytics tracking code here
   googleAnalyticsTrackingCode:
@@ -49,7 +49,7 @@ app:
   queryTimeout: 0

   # time to keep unread statuses (in days), 0 to disable
-  keepStatusDays: 0
+  keepStatusDays: 90^M

   # entries to keep per feed, old entries will be deleted, 0 to disable
   maxFeedCapacity: 500
@@ -75,10 +75,10 @@ app:
 # url is jdbc:jtds:sqlserver://localhost:1433/commafeed;instance=<instanceName, remove if not needed>

 database:
-  driverClass: org.h2.Driver
-  url: jdbc:h2:/home/commafeed/db;mv_store=false
-  user: sa
-  password: sa
+  driverClass: org.postgresql.Driver^M
+  url: jdbc:postgresql://192.168.15.91:5432/ea4badfa-a871-4237-a534-9d69fb464200^M
+  user: ea4badfa-a871-4237-a534-9d69fb464200^M
+  password: v2qmkpa772n1r35gdqrko158nr^M
   properties:
     charSet: UTF-8
   validationQuery: "/* CommaFeed Health Check */ SELECT 1"
@@ -95,9 +95,9 @@ server:
       port: 8084

 logging:
-  level: WARN
+  level: INFO^M
   loggers:
-    com.commafeed: INFO
+    com.commafeed: DEBUG^M
     liquibase: INFO
     io.dropwizard.server.ServerFactory: INFO
   appenders:
Aside from the major three points mentioned earlier, feel free to make additional adjustments to the configurations as you like.
Updating JAR File
In order to bring the created configuration file onto Cloud Foundry, we add it to target/commafeed.jar.
$ jar uvf target/commafeed.jar config.yml
adding: config.yml(in = 3411) (out= 1531)(deflated 55%)
5. Setting Environment Variables (Creating manifest.yml)
In order to run a Dropwizard JAR file on Cloud Foundry’s java-buildpack, we need to:
- Specify a port to listen on with a
javacommand argument - Specify command and the configuration file using the main class (com.commafeed.CommaFeedApplication) arguments
Today, we employed the following measures:
- As a method to hand over arguments to the
javacommand, we usedJAVA_OPTSenvironment variable (Reference) - As a method to hand over arguments to classes specified by the Main-Class of executable JAR, we used
JBP_CONFIG_JAVA_MAINenvironment variable (Reference)
[Extras]- Originally, this was done by forking the java-buildpack repository and rewriting config/java_main.yml.
- From v3.0, we no longer needed to fork, as a method was implemented to inject the content of these configuration files through environment variables.
- This “method using environment variables” is a bit tricky, but the overview is the following:
When injecting content to a file called config/<settings name>.yml (e.g.: open_jdk_jre.yml) through environment variables:- We take an environment variable called
JBP_CONFIG_<configuration name in ALL CAPS>(e.g.:JBP_CONFIG_OPEN_JDK_JRE), - And we script the configuration value with a flow-style YAML. (e.g.:
'[jre: { version: 1.7.0_+ }]')
- We take an environment variable called
We include the information necessary for pushing the application, including these environment variables, in manifest.yml.
$ cat manifest.yml
---
applications:
- name: commafeed
  path: target/commafeed.jar
  memory: 1024M
  buildpack: https://github.com/cloudfoundry/java-buildpack.git#v3.3
  services:
  - pg-commafeed
  env:
    JAVA_OPTS: '-Djava.net.preferIPv4Stack=true -Ddw.server.applicationConnectors[0].port=\$PORT'
    JBP_CONFIG_JAVA_MAIN: '[arguments: "server ./config.yml"]'
We set the memory at 1GB to leave some margin. We also set it to retrieve the latest release (Translator’s note: At the time of the original post), v3.3, from the internet because the support for config/java_mail.yml began with java-buildpack v3.2, and was not available with java-buildpack v3.0 which is the standard for the bosh-lite based Cloud Foundry environment (cf-release v211) that we used today.
6. Deploying Application
Now that the preparations are complete, we can now deploy the application.
$ cf push
..
requested state: started
instances: 1/1
usage: 1G x 1 instances
urls: commafeed.10.244.0.34.xip.io
last uploaded: Mon Oct 12 06:56:07 UTC 2015
stack: cflinuxfs2
buildpack: https://github.com/cloudfoundry/java-buildpack.git#v3.3

     state     since                    cpu      memory         disk      details
#0   running   2015-10-12 04:35:59 PM   105.4%   485.1M of 1G   0 of 1G
.. and it is up and running.
7. Checking Application Behavior
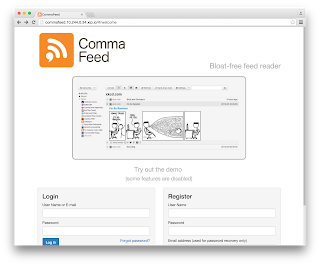
When we access the application URL, we get redirected to the Welcome screen:

Once the user registration is complete, we are automatically logged in:

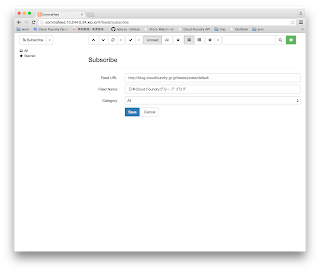
We will register a feed using the [Subscribe] button to the upper left:

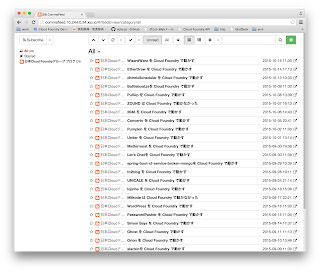
If the feed registration is successful, we get a list of titles of unread articles:

We can read articles when we click on their titles:

We can enter the settings screen if we click the gear-shaped button to the upper right, so we will try setting the language to Japanese:

Click on [Save], and we return to the standard screen.
Here, we see that the menu, etc. are now displayed in Japanese:

This concludes our check of the application behavior.
The impression we got was that, although it required quite a lot of memory, the action was quick and stable, and the functionality was simple but enough. We also valued the Japanese support because it seemed rare.
This application also has a function to send an email when a user forgets her/his password, and a function to use Redis as a cache, but we ran out of time before trying them out. We also omitted the administrator screen from this post, but we did confirm that we can access the administrator screen by changing the configuration of JAVA_OPTS, so we did think that we would like to be able to switch between the two.
Software Used in This Post
- cf-release (v211)
https://github.com/cloudfoundry/cf-release/tree/v211
(commit hash: 2121dc6405e0f036efa4dba963f7f49b07e76ffa) - bosh-lite
https://github.com/cloudfoundry/bosh-lite/tree/552dc6869600c5350eb7ffb4fb9c9c5e79e3889d - CF CLI (v6.12.0-8c65bbd-2015-06-30T00:10:31+00:00)
https://github.com/cloudfoundry/cli/releases/tag/v6.12.0 - postgresql-cf-service-broker
https://github.com/cloudfoundry-community/postgresql-cf-service-broker/tree/99861eef5d220721799a6fc5465a272347b1007a - CommaFeed
https://github.com/Athou/commafeed/tree/8ea44ab8c76ccc498d8bb3dca8b9159e2c39542c- My modified version used in this article
https://github.com/nota-ja/commafeed/tree/cf-100-day-challenge-080
(commit hash: 81fa03f87bc74f0b10316ac92898ef07885bfc43)
- My modified version used in this article


