Translator’s note: This is the 18th article of the series “Cloud Foundry 100-day Challenge selection”. “#081” in the title means that it is 81st (published on October 19, 2015) in the original Japanese series.
Original Author: Takeshi MORIKAWA (GitHub) (company)
The 81st topic of “Cloud Foundry 100-Day Challenge” is a Meteor-based chat tool, Rocket.Chat.
Meteor is a Node.js full-stack reactive framework, and this is the first Meteor-based application picked up in the 100-Day Challenge series.
Its look and feel is very modern, much like Let’s Chat which we have discussed in the past.
Basic Information
- Official site
http://rocket.chat/ - Source code
https://github.com/RocketChat/Rocket.Chat - Other reference
Rocket.Chat: an OSS that allows the creation of a chat space like Slack on the web (Translator’s note: In Japanese)
The summary of procedures is as follows:
- 1) Retrieving Source Code
- 2) Preparation
- 3) Starting Application
- 4) Checking Application Behavior
1. Retrieving Source Code
$ git clone https://github.com/RocketChat/Rocket.Chat
$ cd Rocket.Chat
2. Preparation
2.1. Creating MongoDB Service Instance
$ cf create-service "Mongo DB" "Default Mongo Plan" rocket-mongo
2.2. Pushing Application
Let’s get the URL of the Meteor buildpack for RocketChat from app.json (the configuration file for Heroku Button).
$ cat appj.son
  "env": {
      "BUILDPACK_URL": "https://github.com/RocketChat/heroku-buildpack-meteor.git",
Then push the application with specifying the URL above for -b, and specifying 窶渡o-start.
$ cf push rocket -b https://github.com/RocketChat/heroku-buildpack-meteor.git --no-start
2.3. Binding Service
Let’s bind the created service instance to the application.
$ cf bind-service rocket rocket-mongo
2.4. Configuring Environment Variables
In order to obtain service information of the bound service, we run “cf env” and take note of the uri portion of the credentials.
$ cf env rocket
:
    "credentials": {
     "uri": "mongodb://68608217-650b-4b26-91df-e70ad5105a34:[email protected]:27017/f9d8d716-8426-42a6-bd62-585aecfe43d1"
    },
Then execute cf set-env to set the variable MONGO_URL to the value noted from the credentials.
$ cf set-env rocket MONGO_URL "mongodb://68608217-650b-4b26-91df-e70ad5105a34:[email protected]:27017/f9d8d716-8426-42a6-bd62-585aecfe43d1"
We also set the variable ROOT_URL to the application’s URL by cf set-env.
cf set-env rocket ROOT_URL https://rocket.10.244.0.34.xip.io
Moreover, we set the environment variables below.
cf set-env rocket NODE_ENV production
cf set-env rocket LCB_SECRETS_COOKIE secret
3. Starting Application
$ cf start rocket
:

App started


OK

App rocket was started using this command `.meteor/heroku_build/bin/node .meteor/heroku_build/app/main.js`

Showing health and status for app rocket in org develop / space develop-space as admin...
OK

requested state: started
instances: 1/1
usage: 256M x 1 instances
urls: rocket.10.244.0.34.xip.io
last uploaded: Fri Sep 18 01:28:14 UTC 2015
stack: cflinuxfs2
buildpack: https://github.com/RocketChat/heroku-buildpack-meteor.git

     state     since                    cpu    memory           disk      details
#0   running   2015-09-18 10:58:02 AM   0.0%   134.7M of 256M   0 of 1G
The application has started successfully.
4. Checking Application Behavior
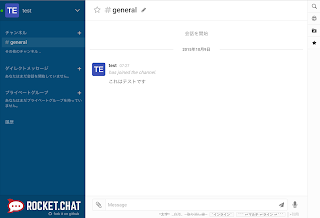
Let’s access it by a Web browser.
Let’s create another user, and try sending a message after signing up and signing in.

Software Used in This Post
- cf-release (v211)
https://github.com/cloudfoundry/cf-release/tree/v211
( https://github.com/cloudfoundry/cf-release/tree/2121dc6405e0f036efa4dba963f7f49b07e76ffa ) - spring-boot-cf-service-broker-mongo
https://github.com/nota-ja/spring-boot-cf-service-broker-mongo/tree/cf-100-day-challenge-068-with-env-specific-configs - bosh-lite
https://github.com/cloudfoundry/bosh-lite/tree/552dc6869600c5350eb7ffb4fb9c9c5e79e3889d - CF CLI (cf version 6.12.0-8c65bbd-2015-06-30T00:10:31+00:00)
https://github.com/cloudfoundry/cli/releases/tag/v6.12.0 - Rocket.Chat
https://github.com/RocketChat/Rocket.Chat/tree/94ce74cb771485fe3f2ba8804169c03fa2a1d352 - heroku-buildpack-meteor
https://github.com/RocketChat/heroku-buildpack-meteor/tree/6656f7d67fdff93615fe58f5c0983cfda978ab12


